
 OpenPost
Export and publish
Check the render, save the file, and attach it to a publication.
Play the full sequence, or the marked In and Out range, before exporting. Then select Export video.
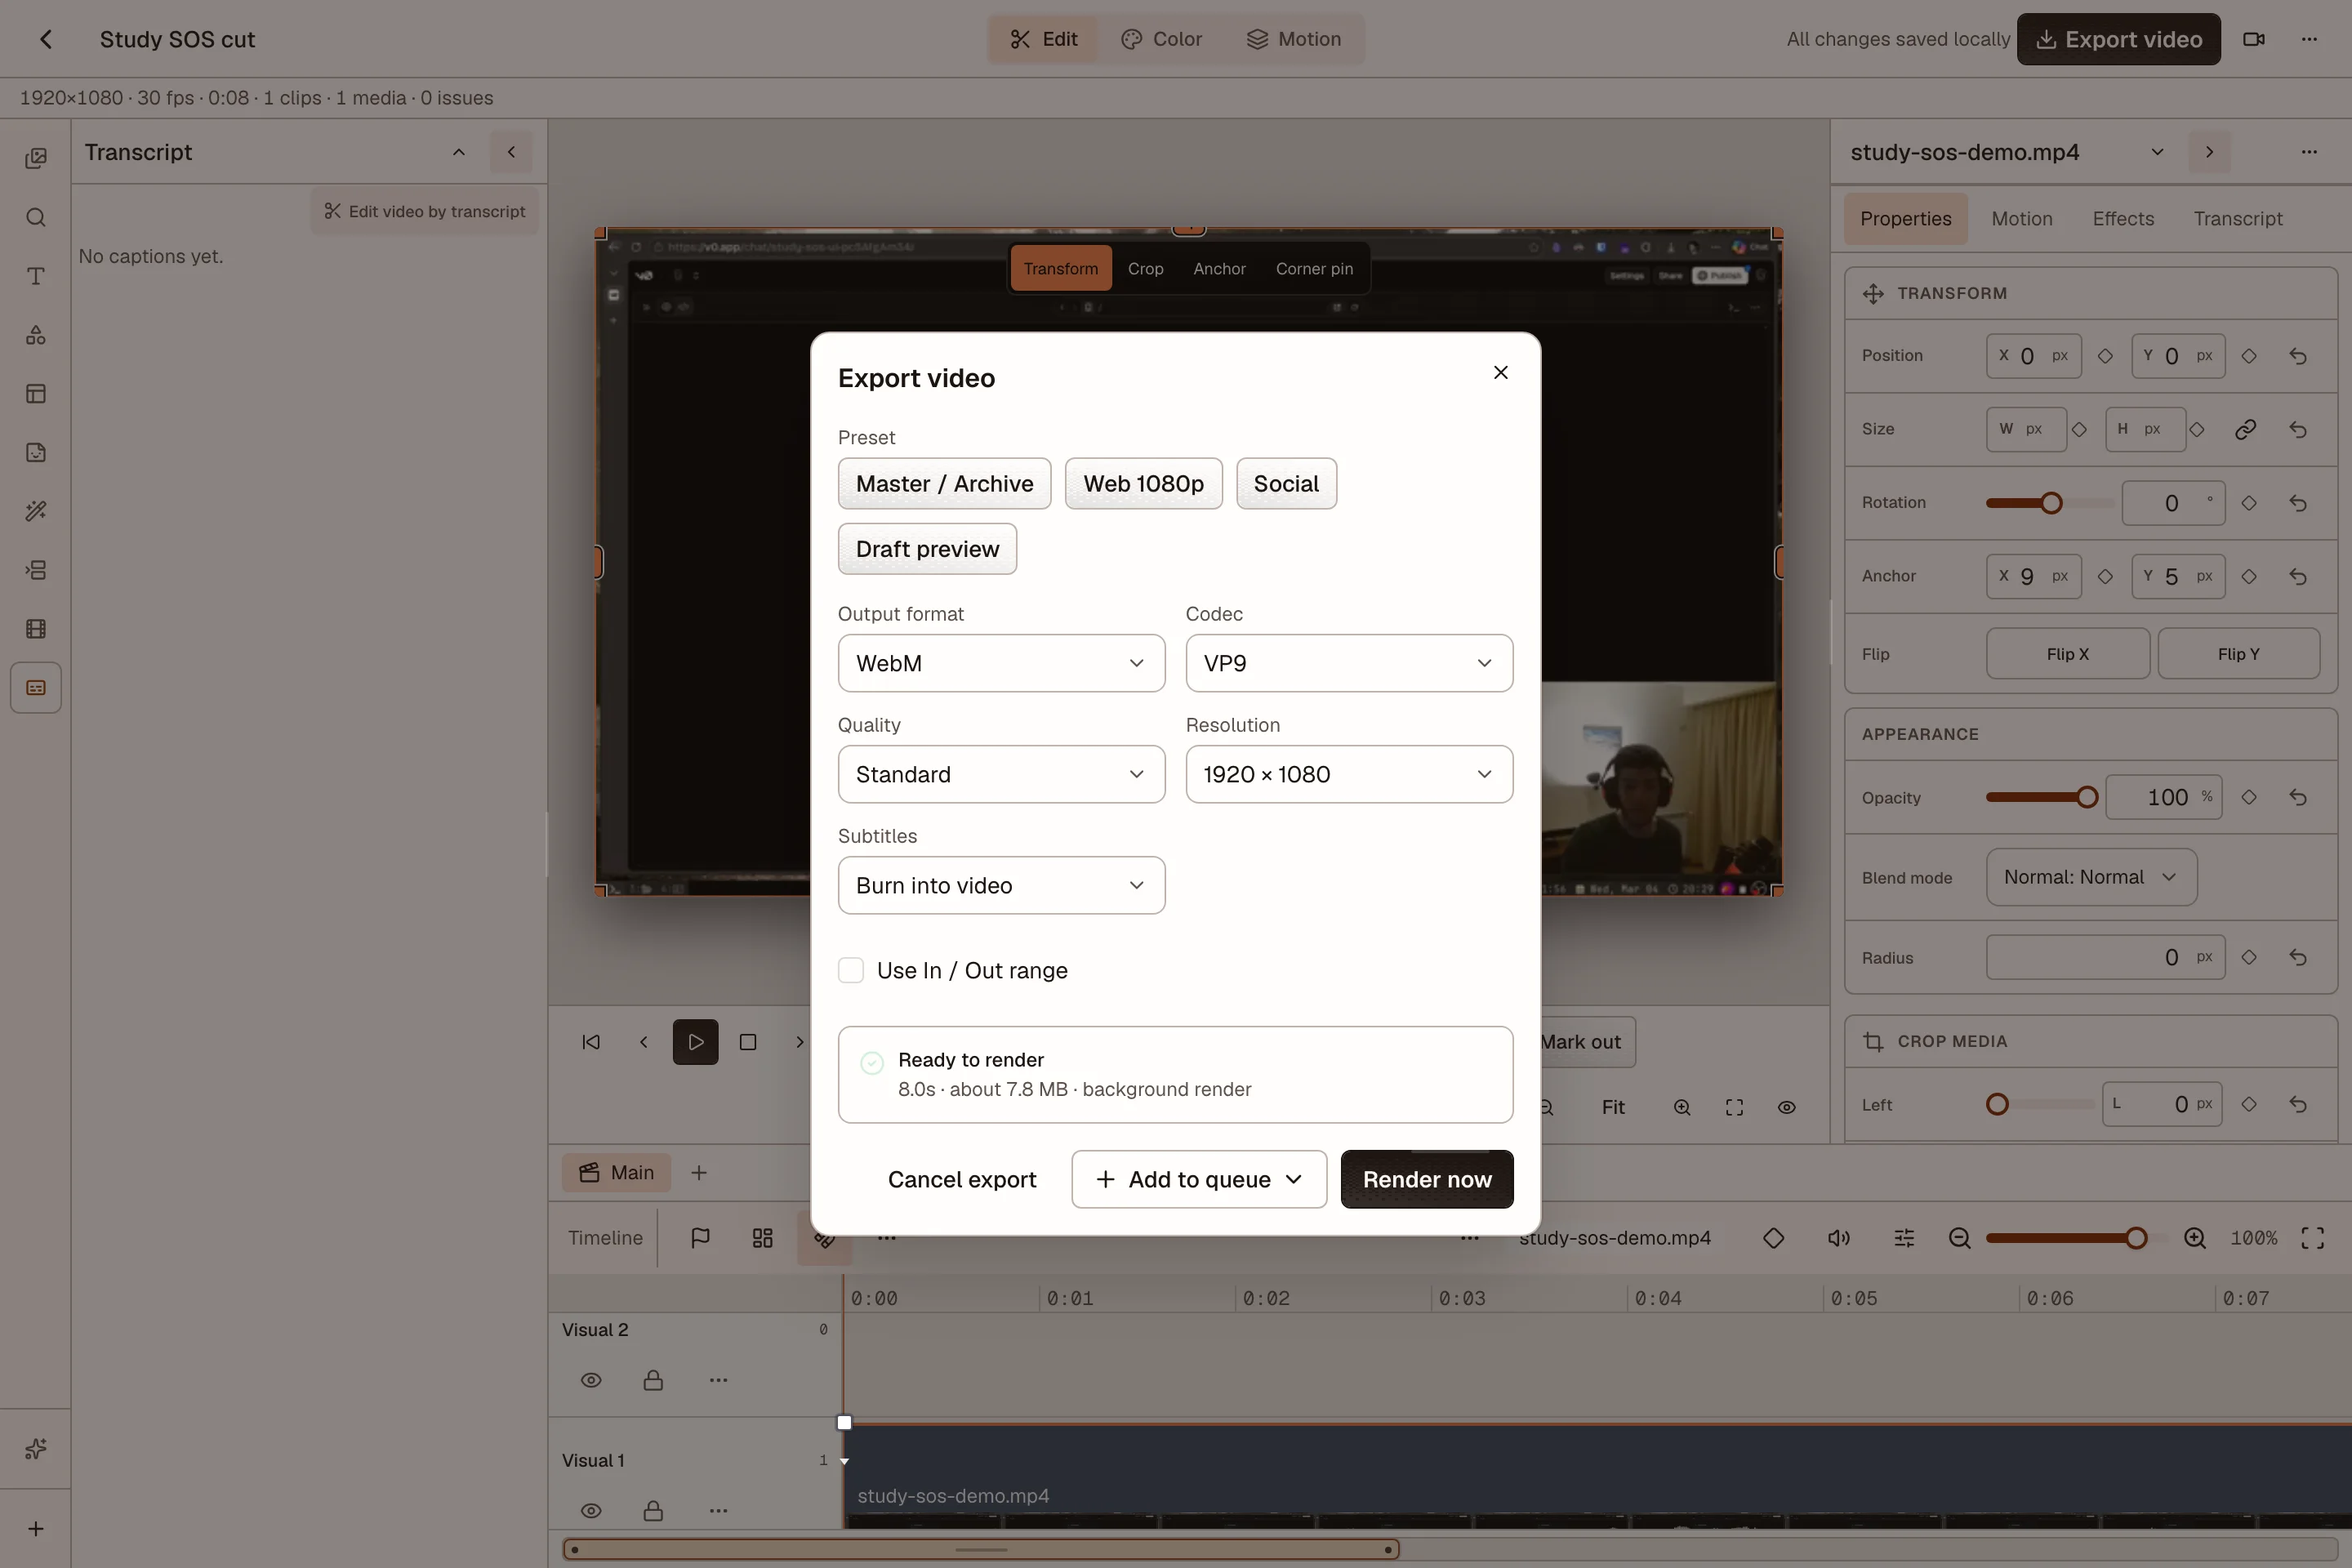
Check export readiness
Choose an output preset, format, and quality. The readiness check reports missing sources, unsupported codecs, subtitle choices, and invalid or empty ranges before rendering starts.
MP4 and WebM are the normal social-video choices. Other containers, audio-only output, and image sequences are available when the selected settings and device support them. Export reads the original sources at the chosen resolution.
Keep the tab open while a render is active. A completed file appears under Exports. Download it and watch the finished result before publishing. If a linked source is missing, reconnect it and run the check again.
Manage several exports
The render queue can hold the whole video, marked ranges, or fixed-duration ranges. Each job keeps the timeline and settings it had when queued. The project renders one job at a time. Use Exports to pause, reorder, cancel, retry, or open finished work.
Use the export in OpenPost
Select Save export to Media to add the file to the current Workspace Media library, or Use in a post to open the composer with that export attached. Confirm the Workspace and destination accounts before publishing or scheduling.
Project Assets do not enter Workspace Media unless you save or send an export there. If the cloud actions are unavailable, sign in and select a Workspace. You can still download the local export.